Showing posts with label homeowner. Show all posts

Tuesday, May 27

Utility Sink

The finished product.
A couple of years ago my dad bought me a utility sink for my birthday. This year as my birthday approaches, we finally got around to installing it.

Attaching the faucet to the tub.
It isn't large, but I needed a sink that I could use for messy projects like washing the dog or dying clothes. And it will be perfect for that. I can also temporarily hook up a hose to the faucet to water the plants in my front yard so I won't need to drag the hose from the backyard around the house.

It was fairly easy to install since the old washing machine hookups were still in the garage. When the previous owner moved the laundry room inside they just capped off the pipes. So we turned off the water and then cut off the caps.

The tricky part was making sure we had the right pieces before cutting off the pipe caps since we couldn't turn the water back on until the project was done. Dad actually ended up making two trips to the hardware store since we forgot something on our first trip. But he actually returned some of the things we got on trip #1 in favor of a different option.

The pipes after we cut off the caps and
before we attached the new connections.
Once the pipe caps were removed we used a plumbing sealant to attach the new fixtures. These had faucet shut offs so I can turn off the water at the wall if needed. The sealant needed to dry for two hours before the water could be turned back on, but meanwhile we finished connecting the plumbing and sink drain to the basin.

Attaching the new connections!
We also bought a drain cover for the garage drain, something that's been on my to do list for a while.

We still need to anchor the sink to the floor since the ground isn't even near the drain, but overall I think the project went very smoothly and I'm excited to have one more thing checked off my to-do list!

Friday, November 30

Break In

Last year my security company called me around 11 p.m. on Thanksgiving to ask me if everything was alright at my house. Since I wasn't there I had no idea. The police were dispatched and found the back door had been kicked in. My dad drove across town to secure the house and give the police officer the information she needed to file a report.

Luckily the house breaker(s) didn't seem to get much further than the doorway before the alarm went off and apparently scared them away. Why you'd bother breaking into a house that clearly advertises that an alarm company monitors it and doesn't appear to have much worth stealing I don't know. I also know that it doesn't take long for the Tulsa police to respond to a call in my area (see the story here).

However, I'd like to take a minute to talk about some tricks for protecting your home while you're out of town.

Having my home monitored gives me a discount on my home insurance, but from what I've read a lot of people who pay for home security systems don't actually use them. I always do. If I'm leaving for 20 minutes I still turn the alarm on, I'm paying every month to have the system monitored. That only happens if I turn it on. There are occasionally false alarms and I have accidentally set the alarm off myself, but if you make setting the alarm a habit then you get used to not opening doors when the alarm is on or turning it off as soon as you walk through the door.

The only real damage from the break in was to the door frame. Except for my front door (which is thick wood) all my doors are metal. When they kicked in the door the only damage was that the cosmetic molding came off (but didn't break) and the wood frame cracked. My dad managed to fix the door so it is even more secure than before. However, I still take the added precaution of barring the door with chairs now as well.

Simple door jam stick.
Where can I find something basic like this?
I want to buy door jams (like the ones in the picture), but most of the ones I've found online are pretty pricey. The one in the picture belongs to my grandma, she's had them as long as I can remember and they are pretty simple. All the ones I can find online are "fancy" which probably explains the high price tag. I'd really prefer something more basic.

I've also taken to having a friend check on my house or even stay if I'm going to be gone overnight.

Another great idea is to put a hold on your mail and newspapers. The police officer who responded to the break in said the fact that the mail was in my mailbox probably tipped the housebreaker off that no one was home. I hadn't thought to put a hold on my mail because of the holiday. Of course, I've also changed to a more secure mailbox, but that wasn't really a result of the break in.

Growing up our neighbors would leave their radio on whenever they were out of town. That way if someone was snooping around outside it sounded like someone was talking or listening to music. You can also buy timers that will make your lights, TV or other electronics turn on at set times. When I worked as a reporter I had a police scanner. If I needed to go out in the evening I would leave the scanner running in my apartment while it charged.

One feature that is nice about my house is the outdoor lighting. Not only do I have some really bright landscape lights in the front, but I have motion sensitive lights all around the house. It can be irritating when a cat or something sets off the one outside my bedroom window in the middle of the night, but I'm glad they were installed.

Even before the break in I was careful not to mention an out-of-town trip online until after I got back. No point in announcing ahead of time when the house will be empty. Everyone uses social media, and it isn't hard to find someone's personal information with just a quick Google search.

Have you ever had to deal with a break in? Was anything actually taken? Do you have precautions for when you leave now that you didn't have before?

Saturday, November 10

Have a Seat!

I've been debating what to do with my front flowerbed for a while. The bed is so deep that it's hard to put enough stuff in it to keep it looking full. My front porch looks pretty nice with the pots that I've added, but between the mortality rate of anything I plant and the size of the flowerbeds, my curb appeal isn't great.

I considered buying a fountain or a large pot to fill up part of the flowerbed, but ran into a few problems with both those ideas.
  • I've got bulbs planted and it would be a hassle to find them and replant them.
  • Fountains generally need an electric outlet and I don't have one in the front yard. I also don't have a spigot in the front to make refilling a fountain as the water evaporates easy.
  • If I put a pot out front I'd have to fill it with plants that would only look nice if they stay alive.
Since big pots and fountains are expensive without all the upkeep and additional projects (like having an electrical socket installed) I began to consider something like a bench or garden sculpture.

I began leaning toward the idea of a bench fairly quickly. 

When I started looking though it seemed like all my options were either cheaply made or way out of my price range (one that I found was over $1,200!).

After looking online, at our local Lowe's and Southwood Nursery I stopped by a place in Jenks where I bought my chiminea a few years ago. Cobber Dean's has plants, but mostly they sell a variety of chimineas and outdoor fireplaces, garden sculpture and outdoor furniture.

Honestly, I wasn't even sure what the place was named--I had to look it up on my bank account. They are located on Main Street right in front of the River City Trading Post. But compared to other places I've shopped their prices are amazing. My bench cost $89, plus tax. And I remember my chiminea was much more reasonably priced than other places as well.

Before we even walked in we saw this bench and thought it would be perfect. The white matches the trim and stands out against the brick. The size doesn't overwhelm the space, but it adds some height to the flowerbed. And since it isn't solid like concrete it won't cover any bulbs I may have planted.

Next spring I'm planning to repaint the bench. Right now the paint is starting to flake off. I like the antiqued look it has, but I think it will look better if it has more white and less of the metal showing.

I'm also planning to arrange a few brightly colored smaller pots around the bench. But not much point in doing that until the weather is warm again--although today was positively balmy with temps in the 70s. It was the perfect day to catch up on projects like planting, watering or washing the car (which my neighbors across the street are doing).

I could also buy a cushion for the bench, but I kind of like how it looks without one.
This shot gives you a view of the pots on the front porch that I mentioned.
I also bought a bush to replace one in the flowerbed that died a couple of summers ago. I got that in the ground today since the weather is supposed to turn wintery on Monday. My hope is that by planting it now instead of in the sprint that it will be well established by next summer and not be as affected by the heat. The last two summers were so hot that I just couldn't keep up with my poor plants.

Sunday, September 23

Earthquake!

Found on Google
Wandering around my house I'm been noticing some cosmetic cracks that I don't remember being there when I bought the house three years ago. Since my house is old enough that settling isn't likely I'm attributing these cracks to the rash of earthquakes we've had over the past several months. 

While the earthquakes weren't strong enough to cause significant damage to the Tulsa area, it did make me wonder if my home was built to stand up to an earthquake. And whether my insurance through State Farm covers damage caused by earthquakes. According to their website, basic home insurance covers theft, fire and hail, but is not limited to these. I probably have paperwork detailing what is and isn't covered, its simply a matter of finding it.

I find it ironic though that the natural disasters most often associated with Oklahoma are tornadoes. I have now experienced three earthquakes, but have never seen a tornado--hopefully I never will. 

Since earthquakes are not particularly common in Oklahoma (or didn't seem to be until recently) I've started doing some research on what to do in case of a particularly bad quake.

I'm pretty sure the only thing mentioned about earthquakes during disaster preparedness drills in school is to hide under our desks or to stand in a doorway. (Looking back I'm not quite sure how much help our flimsy desks would have been if half the building starting caving in on our classroom.)  One website I found said that most doorways are not built sturdily enough to offer protection during a severe earthquake. But I apparently did the right thing when one of our earthquakes woke me up in the middle of the night--I rolled over and went back to sleep! The website said to stay in bed covering your head with a pillow...

Obviously most of the sites I found were offering procedures for very severe quakes. So far the strongest ones we've had in Tulsa haven't been much more severe than what you feel when the thunder/lightning get going during one of our storms. The video below is a quick view of one of our less impressive storms--during a truly impressive thunderstorm my TV would be out.


I think the advice I found the most helpful was suggestions of preventative measures you can take to make earthquakes (or other disasters) less dangerous. Apparently fires and leaking gas/sewage lines are common following an earthquake. Storing flammable substances in secure cabinets on a low shelf and using flexible piping for utility lines help minimize these risks. It's also important to avoid hanging mirrors or heavy objects above beds or seating areas, put heavy items close to the ground and bracing top heavy objects to avoid possible injuries.

Most of the cracks I've noticed around my house are small and in places like the wall above doorways. The only crack that truly concerns me is one I found in the brick exterior on the side of my house (shown on the left). Instead of following the edges of the brick like cosmetic cracks usually do it cuts through some of the bricks. So far I've just been keeping an eye on it, I don't believe I need to worry at this point. However, the question that arises is, at what point should small issues like the cracks around my house worry me?

Has anyone else noticed house damage caused by an earthquake or other natural disaster? At what point did you feel the need to do repairs?

Monday, September 3

I Should Have Been a Plumber...

Old faucet, leaking even after turning it off.
You know what sucks? Unexpected problems like a leak in the water line or a drip in one of my faucets.

A couple weeks ago I finished watering my plants and turned off the outdoor faucet. When I went inside I could still hear the sound of water running, for some reason the spigot was still running even after I tightened the handle all the way.

The old spigot after removal.
Dad came over to take a look and we decided that we didn't need to hire a plumber. Dad bought a replacement spigot, turned off the water at the meter (super easy to do I discovered) and removed the old spigot. That's when we ran into some issues.

For starters, the spigot Dad bought initially turned out to be the wrong size. After a second trip to Lowe's we started trying to screw the second faucet in. This time it was the right size, but the pipe that the spigot attached into wasn't cooperating for us to screw in the new spigot. So luckily I have an amazing dad who actually crawled under my house the attach the new spigot.


My lovely new spigot.
Of course, the problems with the outdoor spigot haven't been the only issues I've had. I'm seriously unimpressed with the plumbing work done by the man who "flipped" my house before selling it to me.

Personal reminder not to run water in that side of the sink.
I've had previous problems with low water pressure (which might have been a result of a leak in the water main that the city was working on), gross brown water from the faucets, the tub faucet handles broke off when I had guests, the bathroom and kitchen sinks both began leaking from the drainage pipe and the most recent plumbing disaster: the replacement of the kitchen drain.

The kitchen sink had a slow leak that didn't worry me overmuch. I just set a container under the leak and emptied it as needed. The other night, however, I finished washing some dishes and suddenly noticed a flood coming from the cabinets under the sink. When I opened them to check I noticed that the connection from the drain to the pipes was unscrewed. How it became unscrewed is a mystery.

I tried to screw it back into place, but the threading wouldn't catch. Dad came to take a look and ended up removing the whole drain to take to buy replacement parts. So I covered that side of my sink with plastic wrap so I wouldn't accidentally splash water from the side that worked. And I made it work for about a week.

The next weekend Dad brought the new drain and other plumbing supplies over and we got to work.

Plumber's Putty
Before we were able to put in the new drain we had to make sure the hole in the sink had a proper seal so the water wouldn't seep out around the drain. For that you use plumber's putty (which just looks nasty). We created a ring with the putty and fit it into place around the hole in the sink. The next step was to put the drain in place, which caused the putty to squeeze out around the edges.

Once the drain was in place we started fitting it to the pipes underneath the sink. I held the drain in place while Dad worked on getting everything connected. Having someone hold the drain is definitely helpful (if not necessary), before I started holding it down the drain would lift up every time Dad began screwing it to the pipes. Makes the job much more frustrating.

After everything was screwed into place we wiped away the excess putty and let it sit overnight for the putty to dry. I tested it the next morning for leaks and everything seemed to work great!

I guess having three or four plumbing emergencies in three years isn't too bad. I'd rather not have any of course, but at least my dad knows enough about plumbing to be able to help me instead of me having to pay a plumber every time there's a problem.

Based on your experiences, what is a typical number of plumbing problems to have in a year?

Wednesday, April 18

Lawn Mowing Monster

Until this spring I think I have mowed for a grand total of 30 minutes in my entire life.

Growing up with so many brothers meant that mowing the lawn was never one of my chores. And until I bought my house I didn't have a lawn to worry about. Then I didn't own a lawn mower so my dad would borrow one and since he was coming out to bring the lawn mower by he would just mow it for me too. After all my yard isn't very big and he claims it doesn't take long.

Then he bought me a brand new lawn mower for Christmas. He showed me how to use it and then it sat in my garage for the rest of the winter. Since my brother moved in soon after that I didn't have to worry about mowing.

To be honest mowing is kind of scary! What if I'm home alone and something happens? How do I figure out what's wrong if the mower breaks? Plus to be honest there are dozens of chores that top mowing on my priority list. As I mentioned in my previous post, "How the Heck Do I Clean Hardwood Floors?", it has been a while since I thoroughly cleaned my floors. Between the dog and me I have trouble keeping the rugs vacuumed! Since I rarely wander through my yard, generally the tall grass just means that Ollie has a jungle to explore.

Now Spencer is gone and I failed miserably at convincing my other brothers to come mow for me. As a result I dragged the mower out a couple of weeks ago. My dad kept telling me how easy mowing is so I got him to tell me again how to start my mower and got started.

In the picture to the left you can see how far I got before my mower quit. So much for it being easy! I called dad and he said I probably had a clog since I had let my grass get so tall.

Now I would just like to point out really quickly that with all the rain we've had my grass went from nothing to almost knee-high in no time, but that's not really the point.

So I turned my mower over and started cleaning the grass out. I decided this job is NOT my favorite. The grass stained my fingers and there were all sorts of bugs that were in the grass clippings. But I got as much out of the mower as I could.

Then I turned it upright again and started the mower again. I got this far when it quit again. Talk about frustrating!

I started messing with everything trying to figure out what was wrong. When I pulled the air filter out this brown greasy fluid gushed out. Lovely right? Now I have grass stained fingers and oil all over my hands. At that point my dad told me not to try to start the mower again until he could fix it. So my mowing attempt for the day was over.


I recently saw an article talking about lawn mower maintenance. I'd never even considered general maintenance on my lawn mower. I've heard that battery or electric mowers don't require as much work, but there are many other things I'd rather spend money on than a new mower. So my dad showed me how to check the oil (which was what had spilled out, apparently I flooded the engine, but the oil really needed to be changed anyway). He also told me that I should buy premium gas for the mower rather than the cheaper stuff you put in the car.

After Dad fixed the mower I managed to finish my lawn, with the exception of areas the mower won't fit. For my birthday I've asked for a weed whacker so I can get those areas too.

I actually didn't mind mowing once I got going. The irritating parts are when the mower quits and that two days after mowing all the dandelions look like the mower never came through.

What is your least favorite spring/summer chore? Ever had any mowing disasters?

Saturday, September 10

The Next Step

A few months back I posted the first in the series on building a deck. Last May I had no idea this project would take over a year, but here's the next step...

Decking:
After the foundation is complete you have to lay the decking (basically the floor of the deck). Laying the decking is a fairly quick process that requires a lot of power tools and screws. Dad bought tan screws since they would match the decking and not be as visible once we were finished. We started by laying the lumber in place. Once we made sure everything was in place we began securing the decking using the screws. 

At this point the boards were still significantly longer than the frame of the deck. Rather than risk cutting the boards unevenly before we screwed them in, Dad waited until they were all in place then used his power saw to trim the edges.

Railing:
The railing was a tricky step. According to our book on deck building, my deck is just high enough off the ground that it needs a railing. But there's a big step between deciding we needed a railing to actually building one. We had to decide how tall the railing should be, whether to buy pre-made railing or to build our own and how to put it into the deck.

After looking at costs I decided we should build our own railing rather than buying a pre-made one. Going with a pre-made railing might be a quicker option and they have several decorative railings that I really liked. However, for me the lower cost of building my own was the deciding factor.

Then Dad and I discussed whether to attach the railing posts to the outside of the deck or fit them into the frame. We decided on the second option. Since the decking was already in place that meant cutting out holes for the posts--which turned out to be a big headache.

As we began cutting out the decking we ran into issues like the wood splitting, the frame hardware getting in the way and tools breaking. Dad came up with creative solutions to circumvent each problem and eventually we got all the posts in. From there we began adding a top and bottom rail to each section of railing. We had decided to use lattice for the railing so the top and bottom rails acted as part of a frame for the lattice panels.
Moment of truth here. I really was not much help during this process. After we finished the decking we took a break because of the extreme heat that swamps Oklahoma in July and August. Once it was finally cool enough to work again I was so busy on the weekends that most of the time when Dad came by to work I was gone. In many cases, 'we' actually means 'he.'
The few plants that survived the 100+ degree temperatures
are shown here. Ignore the empty pots...
The railing is finally finished (except for some finishing touches like molding around the lattice and post caps) and we've moved onto the stairs (which you can read about here).

As soon as we finish the handrails on the stairs I need to start staining and weather-proofing the deck (watch for a how to post on this). I probably should have done that before last winter, but since we weren't finished with the deck I didn't get to it.

As a finishing touch I plan to buy the post caps that have sun powered lights. I think those will add a nice touch. Has anyone else taken on a project as big as building a deck? Do you have a deck and have any advice or tips for long-term maintenance?

Sunday, June 5

Installing a Peep Hole

One of the selling points of my house was the front door. It's gorgeous.  Solid wood with a beautiful design. There were only two problems with it.
  1. The design allows for some hairline cracks that let my heat and A/C escape and the outdoor weather in.
  2. There was no window or peep hole.
Both are pretty easy fixes, but the peep hole was a priority for me. Not having a window is actually pretty practical for a front door, but it was important for me to be able to check who was at the door before I open it.

A couple weeks after I moved in my dad brought his drill over and we bought a peephole at Lowe's. Less than an hour later I was able to peer through my front door to see who's at the door.

I'm actually glad we installed this because I was able to place the peephole at a level that is easy for me to see out of. And this project is one I could probably have done myself (with the help of my dad's tool kit anyway). We took his drill and (making sure the bit was the right size) put a hole through the door. The most important part is making sure the hole is completely straight. Once you have the hole you just put the peephole pieces through each side and screw them together firmly.

Friday, May 27

Tornadoes

So those of you who grew up in tornado alley know the drill. Find shelter, hide in a room with no windows and no exterior walls, bring a mattress, pillows, etc. Or head to the front porch to see if you can see anything.

The storms on Tuesday reminded me that I really have no "tornado hide-out" in my home. All the rooms have windows and my only closets with actual doors are tiny or on exterior walls. I ended up hanging out in my bathtub for a few minutes (even though there's a window in the bathroom) when the sirens went off.

Most of the time the storms don't even phase me, nearly 25 years in Oklahoma and no close call with a tornado (fingers crossed that that holds true for the next 25!) means that most of the time I don't worry too much. However, the damage to Alabama and Joplin and the way this storm was talked up concerned me some. 

It made me wonder if I should invest in some sort of tornado shelter. I know they make underground shelters or in home safe rooms, but I have a feeling those are way out of my meager price range.

What do you do during storms? Any tornado or storm experiences to share?

Sunday, February 13

Bathroom Overhaul

When I bought my house there was only one room that I knew I couldn't stand. Check it out:

Bland, huh? With that white color palette not only did the room feel like it belonged in a hospital, but check out that ugly magazine rack/toilet paper holder in the wall. I'm pretty sure it used to be a space heater (my grandma has them in the bathrooms at her house), but when I moved in it was just an eyesore.

Features you can't really see in the picture are the cheap wood cabinets (they match the ones in the kitchen) and the over-sized cabinet that was hanging about the toilet. It didn't reach the walls, but only left a couple inches on either side between the edges of the cabinet and the walls.

That mirror is awesome though. When I was still house-hunting Spencer would sometimes come with me, even though we weren't planning to room together at that time. One of the houses I looked at had this decorative mirror in the bathroom. It gave Spencer a great view of his midriff, but if he wanted to see his face he was out of luck. My mirror takes up an entire wall and even tilts in a bit on the sides. I love it.

First Step: Color
My first step with the bathroom was to give the room some color. I painted the walls a sage green. I love the color green, but I went through about four wrong shades of green before picking the current color.

I discovered that people weren't kidding when they said bathrooms are the hardest rooms to paint. Luckily the room wasn't big, but the tight space made it difficult to maneuver with a ladder. I ended up asking my brother to paint some of the areas I couldn't reach. I think the color really made the room pop though.

I also bought some black metal paint and went to town on that magazine rack. Once I finished painting I actually thought it was kind of cool.

*Sidenote: I made sure to tape the border and metal rods really well, I wanted to keep the contrast of the chrome against the black and green.

Tying it Together
The next struggle I had was choosing a color scheme to tie the room together. My towels from college were a solid blue, I bought a few more at Kohl's that had the same blue in stripes. Then I went through three shower curtains before I found the perfect one.

Pictures of all three:
Curtain #1
My parents gave me this one.
It hadn't been used in so long that I don't
even remember it ever being used.
Curtain #2
My grandmother bought this
one for me. I love the design,
but ultimately decided it
didn't go with this room.
Curtain #3
Final choice!
I'm so proud of my final choice. The iridescent blues and greens really tie the walls into the rest of my color scheme for that room. I bought the curtain and bathroom set at Kmart, thanks to my mom. I was actually a little surprised they had something I liked, in general I'm not a big fan of Kmart. I feel like you can't rely on them to have what you need from visit to visit, their merchandise changes a lot. My mom loves them though and dragged me along on one of her shopping trips.

That visit was definitely a success. Not only did I find the bath set, but I also found the perfect bath mats! For some misguided reason I actually thought white bath mats would be a good idea at first. Then I tried blue. The final winner were these awesome green mats from Kmart.

Simple Additions
Sometimes the simple touches are what completes a room. My dad surprised me with these pretty shower curtain hangers, which are just perfect. I would have just used the cheap plastic ones I already had if he hadn't found them. Wouldn't that just be sad?

I also replaced the original shower head. I bought a low flow detachable shower head because the one that was originally installed was too low for me. Any time I find something that is too low or tight for me I decide it's a no. If someone who is 5'3" thinks a shower head is too low, a mirror too small or the backseat of a car too cramped (Read about my awesome car here! Note that the car I chose is comfy for anyone, even in the backseat.), I figure it would be nearly impossible for 90% of the population. Plus the detachable shower head is more convenient.

Finishing Touches
I had to take down that oversized cabinet in order to paint. My final step to the bathroom overhaul was to sell that cabinet on craigslist and buy a smaller shelf that fit the space better and to add another towel bar (the only one in the bathroom was in the shower/tub).

I chose a shelf in the same silver throughout the bathroom and with glass shelves. It's awesome for displaying some of my perfume bottles and art.


Not Done Yet!
Despite loving the changes that I've made I still have some plans for that room.
  • The tall cabinet actually only has two shelves, once my dad has time to help me cut the wood to the right size I plan to add a couple more shelves. That cabinet could offer so much more storage than it does now.
  • I've also considered painting the cabinets. Either the whole area, or just the doors. I think a metallic paint in the center of the doors or replacing them with frosted glass would look cool.
  • Another thought I've had is replacing the bath mats with a nice hallway runner. While I love how the mats look, they won't last forever. I read an article that said rugs are more durable since they are designed to withstand more traffic. I think a nice hallway runner in the right colors would look awesome in the bathroom, and last longer.
Help!
When I moved in my neighbor (also a plumber) warned me that the tub was porcelain and would chip/scratch if I used abrasive cleaners (same with my kitchen sink). Despite my best efforts I still have a few nicks in the tub. Anyone have suggestions on how to get this fixed? I'm not even sure who I would call or if it can be fixed.

What rooms were disasters when you moved into your house? How did you fix them?

Thursday, December 30

A New Year Update

I ordered the cushion covers for my new sofa cushions!

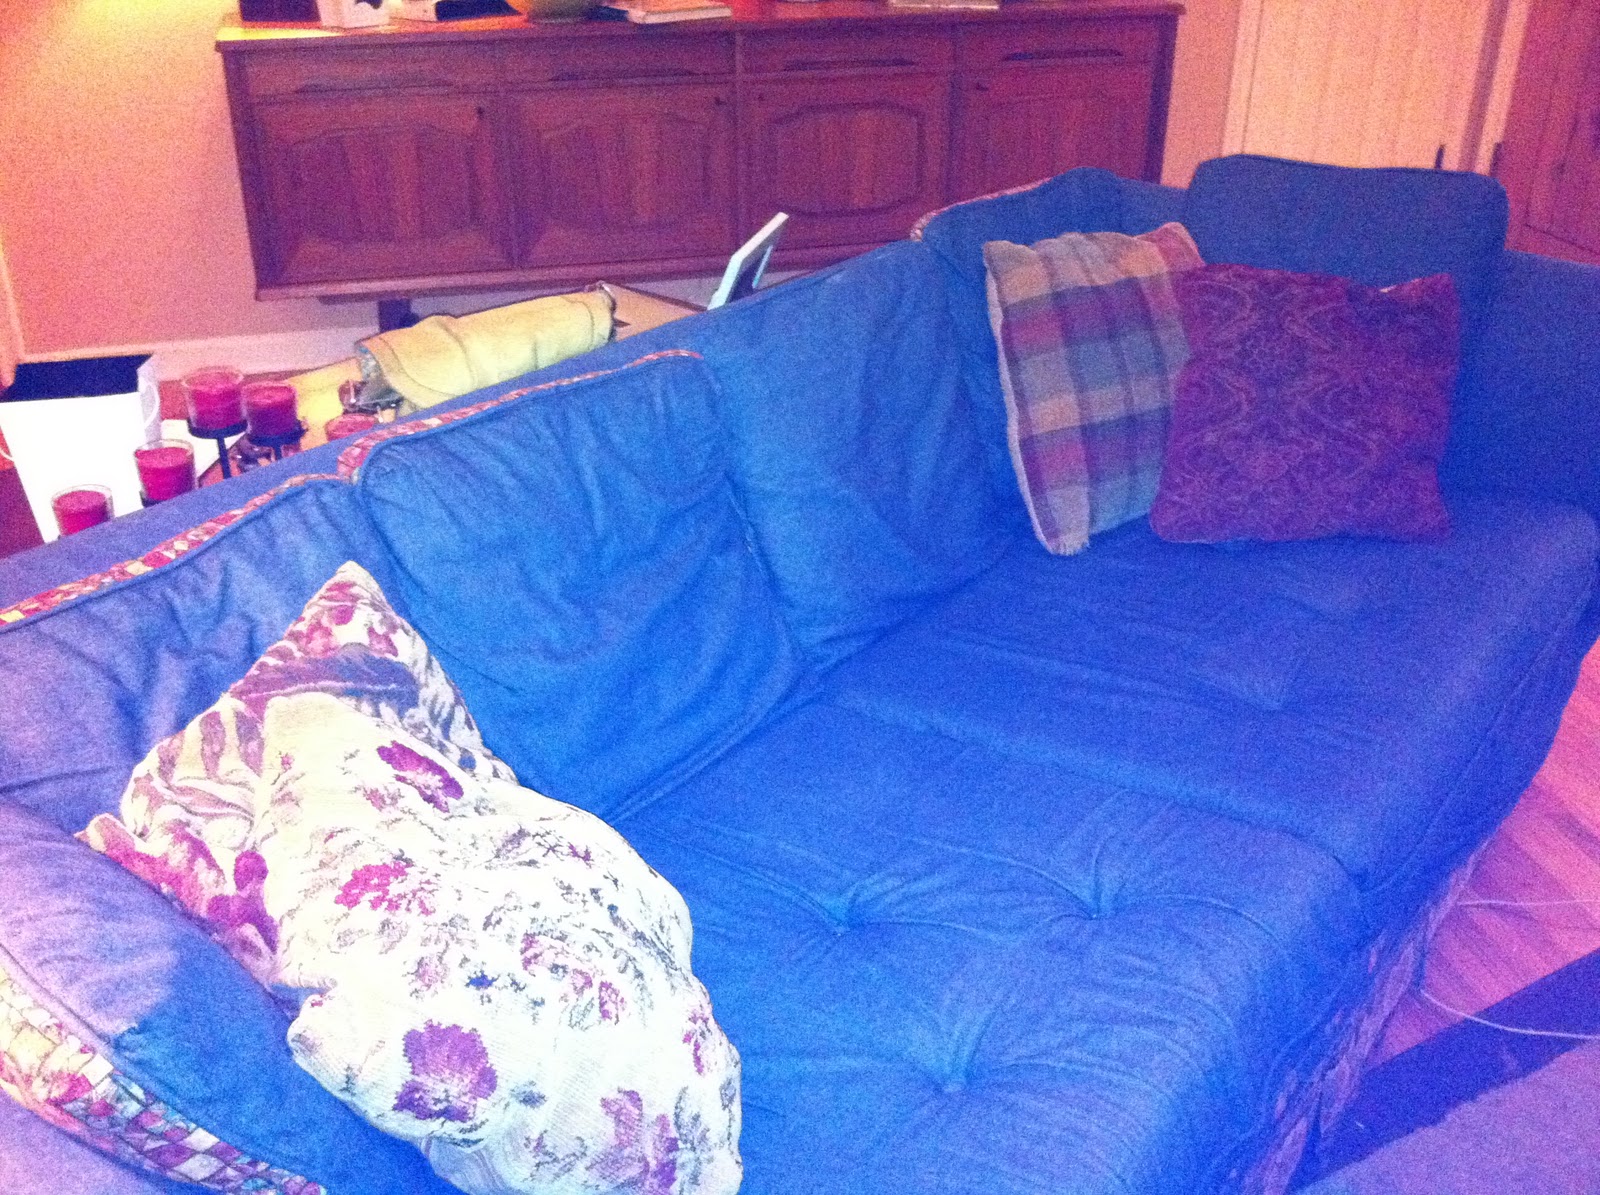
I got my living room sofa for free when my grandparents sold the family cabin, and for the most part it's great. It's comfy and it folds out into a double bed. However, the cushions for the back of the sofa are about an inch thick. And they don't match my decor.

Current couch cushions.
My solution was to go buy Euro size pillows (the ones that are about 27"x27"), so I've had those for a few months now. However, usually you buy shams to go with them. Without the shams they're just a plain white pillow. When I began searching for shams I found some I loved at Saffron Marigold, but I wasn't quite ready to shell out $100 for an "extra" purchase.

I've had Saffron Marigold listed in my "Websites I Love" section for a while now. I love that their fabrics are printed by artisan owned studios in India using eco-friendly fabric dyes. Plus the owners say they are "fully committed to arts and crafts revival and fair trade as a means to safeguard traditional crafts, create employment, and promote economic self-sufficiency." For that reason they work with artisans who love and are proud of what they do and pay fair wages to the artisans they employ. Pretty cool, huh?

Anyway, I haven't gotten the cushion covers yet, but I wanted to share about Saffron Marigold because they are having a sale this week! From now until January 2 all of their merchandise is up to 30% off. The shams I wanted were about $20 cheaper than usual, so I used some Christmas money to order them.

I will (of course) let you know what I think once they come in and I'll share some pics of how the sofa looks with the new cushions.

Sunday, December 26

Saint Francis and my Garden

So as I've mentioned before, my yard was a mess when I bought my house. I think it's come a long way since then, but I'm still gradually adding things.

I spent Christmas at my grandmother's house with my mom's family. We open gifts on Christmas Eve, a process that always devolves into complete chaos as we attempt to keep everyone opening gifts in an orderly manner. Generally this means that the younger kids start ripping everything open while the adults try to make sure they see everyone open their gifts. Then the kids are sent off to play with their new toys while the adults open their gifts. In the middle of this, one of my brothers brought in my gift from my aunts and uncle.

One thing I wanted for my front flower bed was a garden statue. As a Catholic, I couldn't think of anything better than a statue of St. Francis. However, those statues can start to add up cost-wise. My aunt and uncle went in together found me the perfect statue. I thought you all would enjoy seeing my St. Francis statue in its new home.

Remember to picture the back of that flowerbed full of light green and yellow eunomynus bushes. I also need to find some sort of plant that will fill in the flowerbed (and look pretty).

Thursday, December 2

I Finally Did It!

Not my garden, but hopefully what will be growing next spring!
I've said it before and I'll probably say it again. I am not a gardener. However, I love the look that pretty plants give a home and so I keep trying. I took advantage of the extra time my extended weekend gave me to plant the iris and daffodil bulbs that I've had for a few weeks now.

I have no idea how they'll look when they bloom next spring (other than the general purple and yellow, of course) or if they will even make it, but I must admit I felt pretty accomplished.

Procrastination
The chore actually didn't take very long. I had been putting this project off--mostly because I was afraid of how long it would take, but also because bulbs need to be planted after the first freeze of the year. In Oklahoma that usually means after Thanksgiving. Or, as was the case this year, the day of Thanksgiving (every one of my tomatoes died in the freeze, the only tomatoes the plants produced all year).

Getting it Done
On Sunday I called my friend Amanda over for motivational support and got started while she was still on her way. By the time she arrived I was about a third of the way done with digging the trench. Luckily the section of the yard I was working on had very few roots or rocks so the digging was pretty easy. Amanda had given me a bunch of iris bulbs that she dug out of her flowerbeds so I had about triple the amount of those as I did daffodils.

The instructions for the daffodils said to plant them about six inches deep. So I dug a trench along my front walk and put the iris bulbs all along the walk with the daffodil bulbs interspersed. Thanks to the Oklahoma wind my trench kept filling up with leaves. Once I got all the bulbs in I covered them with some of the leaves (after all they were very determined to stay in the trench) then filled in the entire trench with dirt. Hopefully, the grass will grow back in before I need to mow again. I also need to buy some dirt to cover a couple of the areas a little better.

A few things I learned:
  • Dirt is very cold in November. My hands were numb by the time I finished.
  • A 10' long trench that is only 6" deep does not take very long to dig. Maybe an hour. And 19 daffodil bulbs are not enough (it was a good thing I had plenty of iris bulbs).
  • The reason there is never enough dirt left to fill a hole back in is because it all ends up under your nails. Seriously, wear gloves.
  • I have very sweet neighbor kids. About three of them asked if I needed help.

Friday, November 26

Baby, It's Cold Outside...

I hope everyone had an awesome Thanksgiving! This year my dad and I celebrated here in town with a wonderful meal (Dad claims our turkey was the best he's ever made, it was pretty delicious) topped off with an apple pie.

We started a pot of turkey soup with some of the leftovers (you can see it simmering in the crock pot behind my beautiful pie). I loved the opportunity to use my kitchen and my "fancy" dishes.

I have a list of projects that I plan to get done this weekend. Dad and I got the Christmas tree set up last night, I'll post pics once it's decorated and the other decorations are out. I'm excited to show off my ideas! Meanwhile, I broke down and bought something new for the house...

My new electric fireplace.
If you follow my facebook page you probably saw me asking a couple weeks back for advice on whether an electric fireplace is worth the money. My living room is the largest room in my house and I typically have a hard time heating it. This fireplace can supposedly help heat a 400 sq. foot room, or you can turn the heat off and just enjoy the flames. Lowe's had it on sale so I broke down and bought it today. So far I'm really enjoying it. It does seem to heat the space some. Plus now that it's dark out I can enjoy the flames! This particular model also came with a storage cabinet in the mantel.

No pictures today, but I also bought the pendant lights for the kitchen bar area (see more about this project).

Last thought: Did you know that you can recycle your old Christmas lights at Lowe's? They have a bin by returns and customer service that you can just toss those old strings that don't work in. I thought I read that they would give you a $4 off new LED Christmas lights if you recycle old ones, but the store employee didn't offer me any coupons today when I took mine in. Still, it's a better option than throwing them away.

Has anyone else started on their Christmas cards?

Tuesday, November 16

How to (Start) Building a Deck

When I started this post it was May. And to be honest I expected my deck to be done in a month, maybe two. I thought I could cover the entire process in one post. Now that it's November we're finally reaching the final stages of building the actual structure of the deck, although it will probably be next year before the project is truly complete.

Since building a deck is much more complicated than I originally anticipated I will break the process down into a series of posts. Today I'll go over beginning the process. Read part two here.

Make a Plan
This may seem obvious, but Dad and I did a lot of measuring, reading websites (and the pictured book), choosing deck styles and we (i.e. HE) made a list of materials and calculated exactly how much of everything we would need. For day one my brother, Spencer, helped get things ready for building the foundation. I didn't do a lot, the work was pretty slow (a lot of Dad thinking and planning while I sat there).

A Strong Foundation
In this photo you can see the first step of laying
out the foundation. We staked out where the
deck would go using stakes and masonry string.
I guess this can apply to a lot of things in life, but never skimp on your foundation.
Lowe's and other home improvement stores are promoting the new floater concrete post holders. The benefit is that you don't have to dig holes, mix concrete, set the posts in concrete and then wait for it to all dry. But Dad decided not to go that route. He was concerned about how solid the foundation would be if the posts aren't securely set in the ground. So, we dug holes and mixed concrete! Unfortunately the soil around the house is really rocky. So, we altered our plans a little.

Spencer and Burns helped mix cement
and fill in the post holes for the deck.
 *Sidenote: With the high winds and tornado potential in Oklahoma I agree that making sure your deck is secured to the ground is smart.

Our plan alteration was to build a ledge attached to the porch instead of using posts to support the deck near the house. We still used posts to support the rest of the deck.

I began to realize during that first weekend how much more complicated building a deck was than I had realized. It felt like 90% of our time was spent measuring distances to the nearest 16th of an inch. Then remeasuring it...repeatedly. I am the type of person who rounds of measurements to the nearest inch or half inch. If it's very important maybe the 1/4 inch. But building something that needs to hold up under a lot of traffic, weather and time requires very precise measurements. Even understanding that I was very impatient to "start" building the deck.

That first weekend we:

  1. Staked out where the deck would go (using stakes, masonry string and other things). 
  2. Built the ledge to connect the flooring to the back porch.
  3. Dug holes and filled them in with concrete. The yellow tubes (molds) were cut to size and used to keep the concrete in a nice round form. We put J-hooks in the concrete to attach the posts to once the concrete dried. We put rocks in the bottom of the holes to help with drainage.
  4. Attached really expensive post anchors to the J-hooks. Then we cut the lumber and attached it to the post anchors. There was a lot of measuring involved to insure that the beams would be level and aligned correctly. 
  5. Once the posts were in place we built the joists. The joists are the part of the foundation parallel to the porch that supports the beams and decking. 
  6. Now the next step was building the beams, which actually got put off until the next weekend (and I was gone that weekend). When I got home the foundation was complete and we were ready for the next step.
Other options:
  • Before deciding to build a deck I considered purchasing a pre-made deck. I'm not sure of the cost or the best places to buy them, although if you're in the Tulsa area I've heard there is a store near the 51st Street exit off I-44 that sells solid Amish-built decks.
  •  I also considered using composite decking. The benefit is that the decking doesn't require as much upkeep and won't wear like wood will. However, the cost is significantly more (a few dollars more per foot) and it will be years before the wood deck really shows signs of wear.
  • I decided on a fairly simple design, mainly because that's all I wanted and budgeted for. Also, however, I wanted to build it myself. More complex deck styles are an option, of course, as is hiring a contractor to complete the project.

Tuesday, November 9

My Mortgage Payment Decreased?

Last month I used the first of my new mortgage coupons--and paid about $50 less for my monthly payment.

I used the last of the old mortgage coupons back in September and kept waiting for the Bank of Oklahoma to send more. When they didn't I joked that I must be done paying my mortgage. Boy that was easy!

Of course, I knew I still needed to make my payments so I began trying to track down the person at BOK that could explain why I didn't get new payment tickets. I finally spoke to someone who claimed they sent new ones in February when my monthly payment had decreased. What?! I never got new coupons and I definitely wasn't aware my mortgage had decreased! How much easier would it have been if I had known that I could make smaller payments during months when money was a little tight?

This past year seems to be my year for financial mistakes though. During open enrollment for health care at work I realized (for the first time ALL YEAR) that my company has been taking $60 out of my paychecks instead of $6.25 for my FSA. But that money hasn't been going into my FSA. They reimbursed me in this last paycheck, but I feel like an idiot for not noticing months ago. And where was that money going anyway? What if I hadn't noticed?

Anyway, I finally got the new coupons. I'm still curious as to what would make my mortgage DEcrease though. I received a letter earlier this year that I thought said my home's value had doubled (the previous owner bought it for around $45,000 and sold it to me for $86,500), so I thought my taxes would increase. Of course the only things that might make that monthly payment change are changes in taxes, insurance or if I have a varying escrow (which I don't think I do).

Don't mistake me, I'm thrilled that I can make smaller monthly payments. Especially since I have a car payment now too. And it certainly didn't hurt me to be paying more than required. I'm just confused as to why my monthly payment would change. Anyone else have this happen before?

Thursday, November 4

Sustainable

Earlier this week the TYPros Sustainability crew held a short lesson on Winterizing Your Home. I’ve been a member of TYPros for almost three years, but I have actually attended very few of their events. This one, however, appealed to me because it was relevant and I thought it would make a good blog post.

Short Rabbit Trail
Before I talk about what I learned let me talk a minute about the location. The meeting was held in 119 Downtown, a building that will eventually be home to those with a desire for downtown living and a budget allowing for posh apartment space. While there we got to tour one of the units.

Now, I love the design and the open feel. The kitchen might be a little small, but did you see the size of that pantry/laundry room?! It continues around the corner to the left. Wish I had one of those in my house! Plus two bathrooms, huge closets and good-size bedrooms. Awesome.

Of course, I’m not looking for an apartment. Even if I was I don’t think I would live downtown, just not my style. I hate trying to park there and I hate the one-way streets and corner traffic lights. It’s ok if I'm just coming through for a couple hours, but I can’t imagine dealing with that on a daily basis. That said, the employee at the parking garage across from 119 Downtown is awesome. Super friendly and very helpful. If you’re ever needing to park near 6th and Cincinnati I highly recommend going there.
 
Back to the Topic at Hand
There were two speakers at the meeting and to be honest neither really spoke about winterizing your home, though I felt the topics they did cover pretty interesting. They mainly spoke about ways to make your home energy efficient. While there are several steps to this process the main thing I came away with is making sure your insulation is 100% effective. In the video below, Jason Fisher with ICF International covers a few common insulation problems. There are a lot more ways to mess up insulation installation than I realized.


Jason and the second speaker, Lisa Puyear, also spoke about the programs PSO offers homeowners to help make their home more energy efficient. Among those is a rebate on a new A/C unit if you replace your old one with a new energy-efficient one, the Cool Saver program and Home Performance and Quest Audits.


What I Learned
I feel like I should probably do more research about updating old A/C units. I think mine is about 10 years old, and I know this summer it struggled to cool the house when the temperatures got really high. 

I'm also curious about the Home Performance Audit. Jason said the difference between the two audits is that the Quest Audit is just a walk through where the auditor will go through your house and point out obvious problem areas. Windows, poorly sealed doors, etc. Things that for the most part are already on my to-do list. The Home Performance Audit is where they bring the equipment that he refers to in the video and really help you fix any leaking ducts, poorly insulated walls and so on. 

The problem is that everything costs money. It saves money too, but I don't have a lot of cash to put down on the front end.

Have any of you had a home efficiency audit? What are some ways you make your home more energy efficient?

Tuesday, August 24

Amount Due: $0.00

I got my gas bill on Saturday and (as usual) cringed at the thought of yet another bill to pay. Can you imagine the amazing feeling of opening it to see “Amount Due: $0.00”? 

Of course, it’s not that I didn’t use any gas in the past month. My water heater, stove, oven and furnace all run on gas. Out of those the furnace is the only thing I haven’t used lately. So, let me explain how I’m getting gas bills that say I owe nothing.

After moving in last August my first bill from ONG was for $17. In the following months they ranged from  $21 to $65--until January. When I unsuspectingly opened that bill I was aghast to see that I owed $346.07. Supposedly my gas usage went from less than 15 Dth to over 35 Dth in one month. In the month that I spent a week out of town and had a broken furnace for a few days.

Needless to say I called ONG to have someone to come check for a leak. I was told that my meter was checked twice since the gas usage seemed unusually high to them as well. They went ahead and billed me though. 

The technician who came explained my high bill as a result of the colder weather and the meter being under-read the previous month. He couldn't find a leak, but neither of his reasons explained the extreme jump in usage to my satisfaction. I thought about writing a letter, but to be honest I probably would have dropped the issue--if that had been the end of it.

Three days later we were completely out of hot water. The technician hadn't lit the pilot light on the hot water tank properly and I couldn't get it lit. I called ONG to have them send someone the following day. The representative I spoke to informed me the technician would come between 8 a.m. and midnight and couldn’t call before coming. Since my brother had work that afternoon I came home early. After four hours I called to check with ONG and was told when the technician came by no one was home. Since I missed the “appointment” I was going to be charged a $25 fee. Oh, and they could not get anyone out until Monday. I called a plumber and paid $85 for him to relight the pilot light.

As you might imagine, as someone who loathes being cold it made me extremely grouchy to not have hot water. What frustrated me most though was how unhelpful the customer service reps I spoke to were. I wanted to hear something more than, “so sorry for the inconvenience.” I wanted to talk to someone who could DO something. Of course, no hot water and bad customer service were minor problems compared to what I woke up to Monday morning.

 Look closely, you can see where the grass ends.
That hole was as deep as the men were tall.
When I woke up I noticed a group of men digging in my neighbor’s backyard with a small bulldozer and shovels. I thought it was a little strange, but the neighbor was remodeling so didn’t give it too much thought. However, when I realized they had moved to MY yard I was more concerned. I had no idea who they were or why they were digging up my yard so I went outside to find out. They said they were with ONG and (lucky me!) the gas main was in my yard. 

Now, while I realize ONG needs access to the gas main, I did NOT appreciate them digging up my yard without notifying me in advance. By lunchtime they were gone, leaving behind a giant mudpit where they had been digging.

Here comes the part that really pissed me off though. When I got home at 5:30 that evening my house was freezing. The heat wouldn’t come on, my gas stove wouldn’t light and, once again, I had no hot water. The men I had spoken to that morning not only didn't mention that the gas would be turned off, they failed to mention someone needed to be home for them to turn it back on (which was a moot point since my brother was home all morning and until well after they left). 

I understood that the gas needed to be turned off, but it made me very angry that I wasn't warned. The workers didn't even bother to check whether anyone was home before digging or to turn the gas back on. When I called customer service I was told a technician would be out sometime before midnight to turn the gas back on and relight the pilot lights (one of which I spent $85 to have lit just two days earlier). Meanwhile I hovered over a small space heater, eating something I warmed up in my toaster oven (I put both of these items on the must have list for any household).

Because my complaints spanned so many departments I ended up filing a complaint with the Corporate Commission. The Corporate Commission is the only organization that exists to keep monopolies like ONG or AEP in line. They recommended that I send a letter to the company I had a complaint with before filing the complaint with them. So I informed ONG that I would be complaining to the commission by the end of the month if they didn’t work to fix my yard, January bill and the “missed appointment” fee.

In fairness, here's the corner after it was sodded. Looks nice!
Let me finish by saying I don't go on rampages against utility companies (or other businesses) under normal circumstances. Maybe it was simply the fact that I was hit with one problem after another--all from the same source. Or maybe it was because it was winter so I was freezing instead of melting. Either way, the lesson I learned was not to give up when you know you're right. The day after I filed my complaint with the Corporate Commission I was contacted by two ONG employees. One to tell me they were coming to put sod down and the other to offer me a $125 credit to my account. That credit is why I'm still getting gas bills that say I don't owe anything. I haven't had one bill anywhere near $300 since either.
Related Posts Plugin for WordPress, Blogger...